Tuesday, September 11, 2012

"Sew" Excited!!

Okay, so you may (or may not) have noticed that I haven't been doing a lot of sewing these days... I have a sewing machine that was given to me by my wonderful aunt, but it's not exactly accurate and can be a little frustrating.

Which leads me to my excitement and big news! My grandma has given me her beautiful machine she has used for years, but has decided to not work on the big projects any longer. Her machine is old, but the good ones stay great for long! My dad used to work with his dad in a sewing machine sales and repair shop, so you could say that I come from a long line of sewers who know what they're talkin' about.

 (My New Sewing Machine!)


I'm getting the new machine tomorrow. It had to be driven down to my little town in Florida all the way from the upper peninsula (U.P. for those who are familiar with the lingo) of Michigan! Sooooo... how special do I feel?! Pretty special!

Oh, the sewing projects I can do! I've heard it's fancy too. (Hey, that rhymed!)

Thursday, September 6, 2012

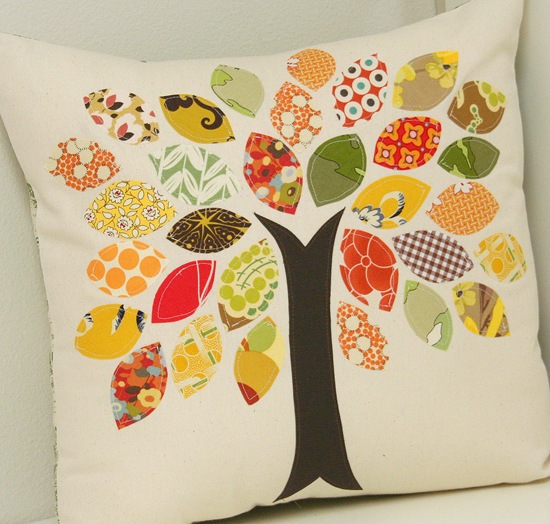
Festive Fall Pillow

 (Photo courtesy of CluckCluckSew)

I am totally crushin' on this Fall pillow design! I stumbled across it this morning while mindlessly looking through Pinterest for Fall craft ideas. I'm often found doing this in my spare time these days... It's addicting, I'm telling you! But now that the autumn breezes are entering the air, I am getting more and more in the mood to sew, knit, and bake some apple pie.

How could you NOT love this pillow?! First of all, you get to use up some of those scraps of fabric you've been saving (just in case), and seriously, the sewing is "sew" easy. Love, love, love easy!

Cluck Cluck Sew has got it going on. This "chick" is right up my alley in terms of style and ease. Okay, no more puns, but seriously, I do love this blog. Be sure to check Allison out over at CluckCluckSew.com.

Thursday, July 26, 2012

Recycle in Style!

My youngest daughter has been interested in recycling since she learned more about it in school last year. Now, she looks on the bottom of just about every container to see if it has the triangle label showing that it can be recycled. But, instead of throwing it in the recycle bin, she has found ways to recycle items throughout the house... such as cereal boxes, jars, and milk cartons. I'm amazed at her creativeness, and I'm positive it didn't come from me.

For example, she has recently found an interest in surfing, and has always loved Barbies. So, combine the two and you've got a Barbie surfboard! I'm seriously thinking about patenting this idea. My husband (who also has a love for surfing) drew a surfboard on the inside of a cereal box, and my daughter cut it out and decorated it with craft paper.


And so began my inspiration... I thought it would be fun to look around the web for some other ways to recycle the items we typically would throw away, and here are a few I particularly liked.

(Photo courtesy of BuzzFeed)

Take a clean lotion bottle and carefully cut out the shape shown above. Paint or stencil the outside and tada! you have a handy all-in-one-place phone charger. No more cords all over your counters, floors, or desk. I love this idea and will be making my own very soon!

 (Photo courtesy of ThriftyFun)

A bird feeder out of a milk jug! This is a simple and fun activity to do with your kids. At some point, I'm guessing we've all had a milk/water jug that we were done with. You could make this fancy or just cut the holes and place it outside on a post or hanging. I've priced out bird feeders before, and they can definitely be a little pricey. This one is practically free! You'll need to add birdseed, however... Go HERE for directions to make your own.

(Photo courtesy of CraftyNest)

Hanging (or not hanging) glass jar lanterns. I love this idea of using your glass jars as beautiful lanterns for entertaining outside! If you have a deck or patio, you could place your clean jars out with beautiful votives and have a nice evening outdoor party or get-together.

I often have jars from pasta sauce, peanut butter, oil, etc and don't know how to use them, so they usually end up in the recycling bin. When I was a little girl, I remember my mom using mason jars for glasses to drink out of. It added a country feel to our kitchen with very little money.

TIP: In order to clean your jars from the labels that are usually hard to get off, soak them in hot water for at least 5 minutes (or run them through your dishwasher cycle), then use a product such as "Goo Gone"and you should be able to get it right off.

I'd love to know how you recycle in your home!

My Savings Site

For those of you who know me only as an amateur sewing/crafty person, I thought I'd let you in on a whole other side to me! You'd be amazed at just how many sides I have... even my poor husband has a hard time keeping up.

Coupon Saving Game Button

I have a frugal side to me. And even started a blog back in 2008 to showcase this side of me and to help others save like I do. Although I don't keep up on the blogging side of it as much anymore, I decided to go ahead and put a link on this site in case you're interested in learning more about saving. You'll find this link on the menu bar and I'll try to update you as I post savings.

Here's a direct link to my savings site: http://thecoupongame.blogspot.com

Thursday, July 12, 2012

My Realities of Homeschooling

So, since this is my blog about life, sewing, and everything I enjoy in this world, I thought I'd do a little post on my thoughts as a homeschooling mom. 'k?

When I first started homeschooling, I felt as though it was thrust upon me. My oldest daughter was an eager learner and told me one day, "Mommy, I want to read." That was it. Well, actually, I hesitated and said, "Not yet." After all, she was only three years old at the time. I was not ready for the challenge of teaching my child how to read at such a young age. After her continued asking and begging to learn how to read (Did I mention she is an E.A.G.E.R. learner?), I caved and said, "Okay." She was almost four at that time. I picked up the Kindergarten Hooked On Phonics box I found on sale at my Big Lots store and I started teaching my Sophie how to read. It was a breeze! (Once again, please remember that she is an E.A.G.E.R. learner - I cannot stress that enough.)

And thus started my world of homeschooling. Sophie got to be of school age and I found she was too smart (Can I say that about my own daughter?!) to enter Kindergarten when I thought she was ready for 1st grade. No school would allow her to move up, so we decided to continue on with our homeschooling venture. Most days, she would wake up asking me, "When do we do school?" and I would drag out the books and begin teaching. I dreaded it. And looking back, I wonder why?! She was, quite possibly, the easiest child on the planet to teach. And I know this because I have two other children who are more normal learners.

After 5 years of teaching two of our children at home and our third now entering Kindergarten, I told my husband I needed a break from homeschooling. He agreed and we prayed about what school to send them to. God provided the funds for a wonderful Christian school and we went full force in that direction. The kids thrived in the school, and after some initial hesitation, they even loved it! Of course, I missed my kids, but I knew they needed this year to learn and grow in more ways than one.

And now we come to present day. We were excited to continue on with this wonderful school, until one day, very recently, God placed it on my heart that I was to homeschool again. To say that I was devastated is an understatement. (Just being honest here!) I know my inconsistencies as a home teacher... I know my mood swings and how I struggle to keep my mentality calm and collected when my kids are driving me nuts. I know how I lose my cool when my kids don't get the concepts that I'm trying my very hardest to teach them. I know that my house will be a place of many little messes, including books everywhere, crayons on my floor, dishes not done, dinner not planned, and those little pieces of paper that the kids just had to cut up to make a special card for someone.

And yet, the Lord stills my heart. And I find a desire and even longing to homeschool my children again... to raise them up as only He desires me to. I know that I will need time in His Word daily to make it through those rough days that will most likely be more than not. Note: I will need to earnestly seek out that time. However, I eagerly anticipate what God has planned for all three of my children and for me.

My heart... I asked God for each one of my children, and He chose to bless us with each one. I can say without hesitation that I not only love my kids, I really like them! They are, by far, the coolest people I know. I pray for a renewed joy in my heart to teach them at home and to enjoy each moment with them.

Thursday, July 5, 2012

Simply Crepes


We love these crepes! They don't last long in our house... I actually made 10 of them, and this was all that was left for me to take the picture! That says somethin' right there. I love them with some warm Nutella spread inside before rolling. YUM!

Ingredients:
1 cup all-purpose flour, level scoop
2/3 cup cold milk
2/3 cup cold water
3 large eggs
1/4 tsp salt
3 Tbs melted butter, plus more for brushing on pan

Instructions:
Mix all the ingredients smoothly in a blender or food processor, or with a whisk. Refrigerate 30 minutes or more. A rest allows the flour particles to absorb the liquid, making for a tender crepe. Heat a nonstick frying pan (I used an 8″ stainless steel and it worked great.) with bottom diameter 5 to 8 inches until drops of water dance on it; brush lightly with melted butter. Pour in 2 to 3 tablespoons of batter (a small ladle is handy here) and tilt pan in all directions to cover bottom evenly. Cook about 1 minute, or until browned on the bottom; turn and cook briefly on the other side. Cool on a wire rack as you continue with the rest. When thoroughly cool, stack and refrigerate for 2 days, or freeze for several weeks.

*Crepes are an inexpensive way to jazz up a simple dish.

Serve for breakfast with softened cream cheese spread and fresh preserves. Roll up as pictured or fold into fourths and serve with a sprinkling of powdered sugar.

This recipe courtesy of Julia’s Kitchen Wisdom by Julia Child.

Mini Chocolate Ice Cream Cookies

These are a favorite summer treat in our house. I love the simplicity of them, and they even have some health value to them... note, I said "some." Made with natural ingredients, their a great go-to treat to make ahead and have on-hand.

Ingredients:
1 box Back to Nature Oatmeal Cookies
1 1/2 c Breyers 1/2 the fat All Natural Vanilla Ice Cream
1.5 oz Ghirardelli 60% Cacao Bittersweet Chocolate, chopped finely

Instructions:
Remove ice cream from freezer and let stand at room temperature for 5-10 minutes to soften. In the meantime, chop chocolate finely. Line a freezer-proof container with wax paper. Place 1 cookie face-down and scoop approximately 2 tablespoons ice cream onto cookie and top with another cookie, pressing slightly to flatten. Roll the edges of your cookie sandwich in chocolate to cover sides. Place in container and put in freezer to allow to firm-up.

*Yields 10 cookie sandwiches.

Friday, June 8, 2012

Family Wall Decor

Our family has lived in the same house for almost 7 years... And in those seven years, I have not figured out quite what my style of home decor to be. We've done some remodeling, mostly in warm earth tones with tile, paint, and furniture. But, I've always had this one wall that I couldn't figure out what to do with. It was blank for a while, then I changed the furniture around and hung some pictures, then I didn't like that, so I changed it back to blank, and so on.

Well, I'm thrilled to say I finally got some inspiration and did something about that wall. Within a few days and a lot of deal-searching, I ended up with this!


I wanted a wall to put personal pictures of our family on, along with our kid's favorite art projects, and attempt to blend-in the television. So, here's how it came about: I mounted our TV, found the ottoman/bench at Target, and went on a hunt for discount frames and wall art. I found most of the frames at TJ Maxx and got the metal wall art at Hobby Lobby during their 50% off sale. Overall, this cost around $250 and is a warm and welcoming focal point in our house.

My husband loves it, which is a blessing to me to see a good reaction from him. On that note, I've recently been updating and organizing/cleaning-out rooms in our house. I've been inspired by Sarah Mae (a blog I've been reading for several years) to make my home a blessing to those who enter it - including my own family. This gives me even more reason - and really a more fun reason - to keep it clean and looking nice (note: not perfect).

Saturday, June 2, 2012

Summer Fun in "Hot"lanta

It's summer and the heat is on! So, what better way to celebrate the heat, but head to "Hot"lanta?! And that's just what we did.

(Our family at Zoo Atlanta. - I love the giraffes in the background.)

We got home from a fabulous week-long family vacation, spending most of our time in downtown Atlanta. It was a trip to take in the sites. We found a great deal at CityPass.com and were able to see five of the main attractions Atlanta has to offer. From the Georgia Aquarium, World of Coca-Cola, CNN Headquarters, Fernbank Museum, and Zoo Atlanta, we definitely got our money's worth.

You can't see it, but our hotel was situated right between the two taller buildings on the right of this photo. We were in the center of it all, walked everywhere, and it was great!

The only downside to starting out your summer with a vacation is that you may think it all goes downhill from there. Not with us. We got home yesterday and already we had a fun day at our local pool playground celebrating the end of the school year with all of our church friends. The summer is already feeling busy, and though I do plan some lulls, we have a summer worth of fun - complete with swimming lessons, VBS, free summer movies at the theatre, and trips to the beach.

Since my kids have been in school this past year (and no longer homeschooled), I've missed having them around. I'm hoping to reconnect with them, have some fun, and continue teaching them about the Lord and walking with Him.

Hopefully, I'll fit some sewing into the summer. Right now, the project is to go through every room, organize, and clean. I've started with my bathroom and now I feel like I have a mini-spa feel every morning I wake up. It's wonderful! Oh, to have this feeling throughout my house...

Tuesday, March 6, 2012

NEW Burpies & Paci-Clips!

I am excited to begin my Etsy shop more full-time. I've added a couple of listings today (shown below) and will be adding many more options throughout the week. I'm in love with the fun designer baby items and have begun to make some really cute items for babies. I hope you like them too!

Here are two colorful burpies made with designer fabric over soft minky dot fabric. I LOVE them!

And of course, a matching paci-clip made with coordinating designer fabric and fits all pacifier styles.

If you are looking for some adorable burp cloths or pacifier clips, be sure to stop by my store at www.etsy.com/shop/SewWhatSteph. I can make these to make your baby decor style as well.

I hope you'll check it out and let me know what you think!

Sunday, January 8, 2012

Quilting Block #1 - Nine Block

I'm so excited to show you my first quilted block! Granted, this was an easy one. I changed it up a bit with a focal center block. My daughter helped me pick the fabrics and arrange them. Here's the process if you want to make your own Nine-Block. (I was working with my camera phone as I'm missing my normal camera downloading cord, so I'll apologize upfront for the grainy pictures.)

Here's what you need to get started...

You'll need 3 coordinating fabrics with nine squares measuring 5-1/4" x 5-1/4". I used four squares of two different fabrics and one square for the center fabric.

After you've cut your squares, lay out your pattern. Make sure that the fabric squares lay all the same way.

Begin by sewing one row together. You'll do this by taking one square as laid out above and sewing it to the next. I used a 5/8" seam. Continue this with the next square. You'll do this with each row separately.

When you're done, press your seams open and it should look like this.


Continue by pinning the top row to the second row front sides together (like so!) making sure the seams from Row #1 and Row #2 match up.

Here is what it looks like...

Pin the next two rows together front sides together and continue sewing Row #2 and Row #3 together.

Once you've sewn your three rows together, you'll want to press the backside seams open. It will look like the above picture.

And, "Ta-Da!" here's the finished block. I love the centered "coffee" square. This block represents me in so many ways. I love pink, polk-a-dots, geometric designs, and of course, Coffee! This project took a quick one hour from cutting to finished product.

Saturday, January 7, 2012

Quilting Blocks - Part 1

So, as part of my new year's resolutions, I am challenging myself to create a new quilting block each week for the month of January for a total of 4 weeks - maybe longer, but I'm starting with January so as not to overwhelm my resolutions. Clearly, I'm already behind, but I've picked an easy block to start with and should have it completed by tomorrow. I'm great at starting things and not so good at finishing. Here's the super simple Nine-Patch block I'm starting with.

I'm using 2 alternating fabrics for a total of nine 5-1/4" squares and I'll be sewing using a 5/8" seam throughout to form a 12-inch x 12-inch total quilting block. Since I'm starting at this size, all of my quilting blocks will need to be this size. (That's more of a note to myself!)

If you'd like to join with me in quilting a block per week, please do! I love working alongside people... even if it's online. Maybe we can share pics. Eventually, my goal is to create a sampler quilt with all of my blocks.

Thursday, January 5, 2012

Sew Crafty Sites

I wanted to post about super simple straight-stitch projects for all you beginners out there. (Wow! That wasn't meant to be a tongue twister.) Here are a few projects that you can whip up in a day and give as gifts or keep for yourself!

SkipToMyLou is a favorite blog of mine. She focuses on another blogger, Hilani who wrote a thorough tutorial on how to make these great coasters. Click HERE to learn how you can make them too.


Next, I found these adorable curtains. Since curtains are sewn by the size of your window, it's hard to do a tutorial on measurements. Basically, you want to measure your window's width and double it for a fuller curtain. Go by the length and add a few inches for hems. How's that for a tutorial?! These curtains were made by TheHappyHousewife. Check out her post HERE.


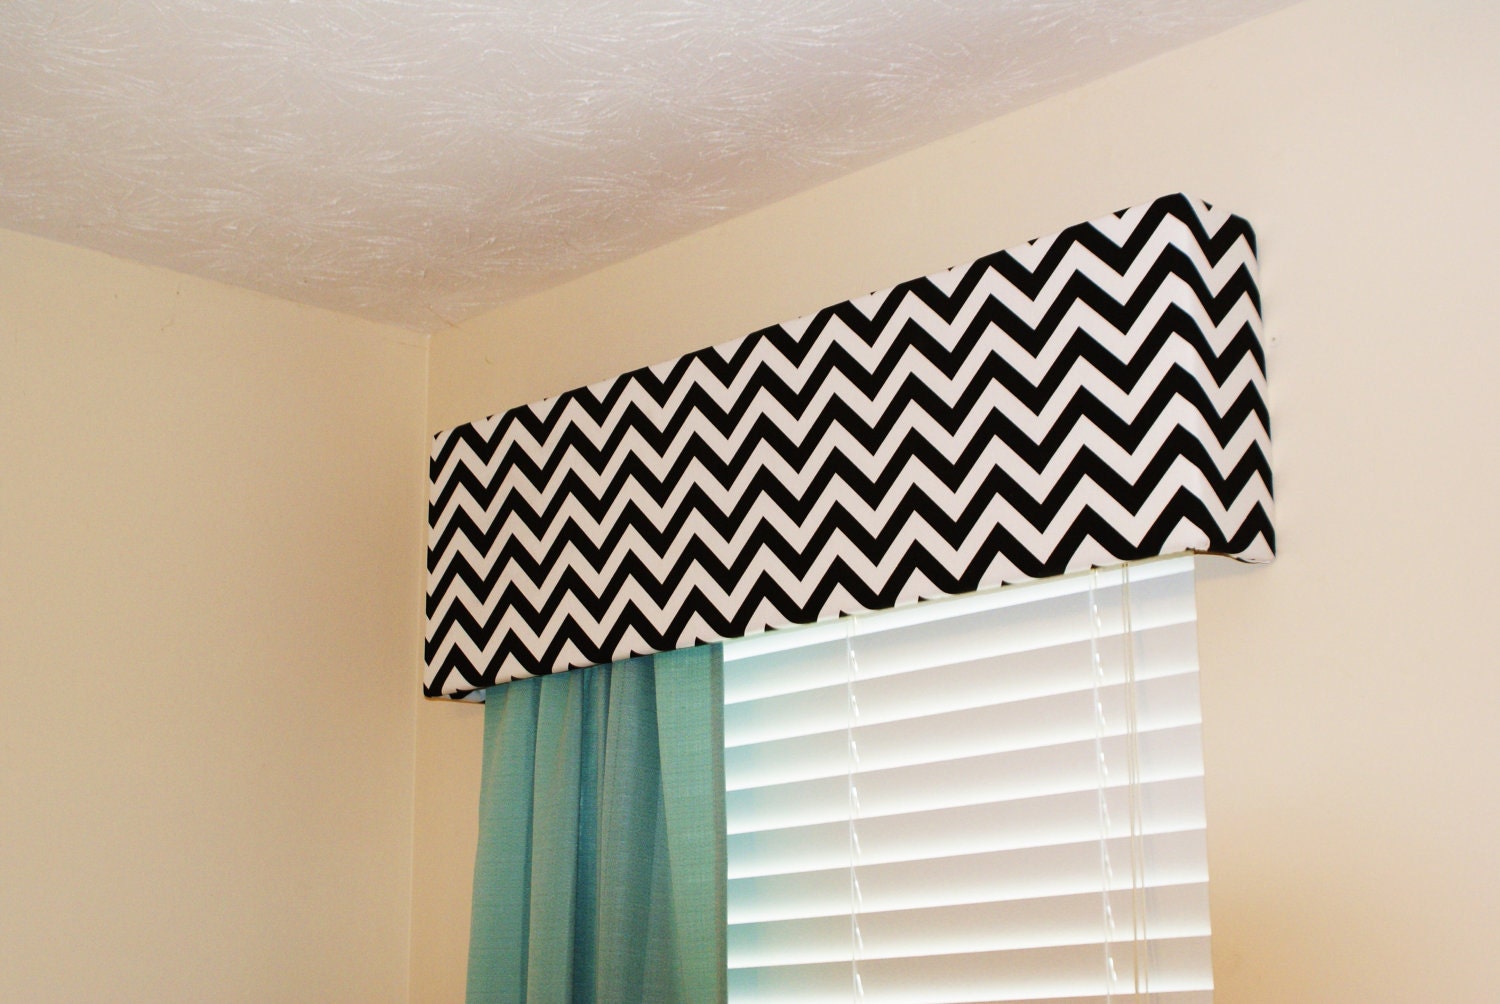
And finally, keeping with the curtain idea, I fell in love with these window cornices. I don't have a tutorial for them, but I'm determined to make a couple for my living room windows. They just seem to need something... and I think this would be a simple fix. Be looking for a tutorial soon...

Sunday, January 1, 2012

Our New Puppy!

My husband and I have wavered on getting a dog for a little while now, and finally found the right one for our family. And she came at a great price - free! She is a Chihuahua/Pekingese/Terrier mix.
This is "Addy"!
She looks a little sad in this picture...

She's very little (only 4-lbs at 8 weeks old) and likes to curl up under our ottoman. She fits under there like a bug in a rug.

Our house is just under 1400 sq ft and we love it, but it does make for cozy quarters - whereby a close-knit family (right?!). Addy's small size is perfect for our house. The only problem is that we have to make sure we don't step on her - she's so little! She's become a part of our family and I love that everyone is taking to her well. She seems to like us as well.

Fun With Words - Free Wall Art!

I came across a fun and free website where you can create word art. Here's a sample of some I created using characteristics of my children, Sophia, Emily, and Isaac. I love how they turned out!

(Click on images to see larger.)

I think this would be a fun craft to make and frame to put in each of my children's bedrooms. It's also a great gift to give to a special friend to tell them what they mean to you. You could add it to cardstock for stationary as well. Oh, how the possibilities are endless!

Click HERE to go to Wordle.net and make yours for free!